Home / Blog
|
How to Set up a Cron Job in cPanel
“Cron” is software utility for Unix-like operating systems,
such as Linux and OpenBSD. A “cron job” is a command
that allows you to run scheduled tasks on your web server. For
example, suppose that you’d like to run a particular script on a
daily basis, but you only want to run it during non-peak hours, and you
don’t want to be bothered with taking the time (or remembering)
to run the script manually. To make your life easier, you can set up a
cron job in cPanel that will automatically run your script on whatever
schedule you wish.
In cPanel, scroll down to the “Advanced” section, and click
on the “Cron Jobs” icon.

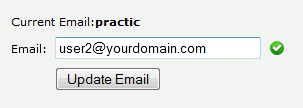
In older versions of cPanel, there are two ways to set up a cron job: Standard and Advanced. This tutorial uses cPanel 11.48.1, which has only one method of creating cron jobs, but the concept is the same for all versions. By default, the user who created the cron job will receive an email every time the cron job has been run. There will also be an email in the event of an error while running or attempting to run the cron job. If you’d like the notification to be sent to a user other than the one specified next to “Current Email,” then enter a different email address in the “Email” field, and click the “Update Email” button.

If you don’t want to receive any email notifications, you can instruct the server to redirect the output to /dev/null by placing the following code after your cron command:
>/dev/null 2>&1
s
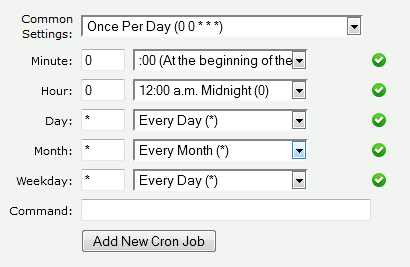
The next step is to specify the schedule on which you’d like your cron job to run. You have a lot of options here, and the most common ones are listed under “Common Settings”. For example, if you click on “Once Per Day (0 0 ***),” the remaining fields will automatically populate with the correct settings, as shown below:


If the Common Settings are not to your liking, you can leave that field alone and adjust the settings in the remaining fields. Finally, enter your command in the “Command” field, and click the “Add New Cron Job” button. For the purposes of this demonstration, the following command will be used:
php -q ~/public_html/arpmgr/a.php cli/auto>/dev/null
2>&1
I don’t want to receive email notifications, so I added the appropriate
code (highlighted in red) after my command.

The command that I used is for an autoresponder program. If you are using a third-party program, the vendor will usually provide you with the appropriate cron job command and what settings you should use for the schedule. If you’re running your own script, then the choice is up to you, and you’ll need to familiarize yourself with the command syntax. There are many free resources online to help you learn about cron/crontab commands.
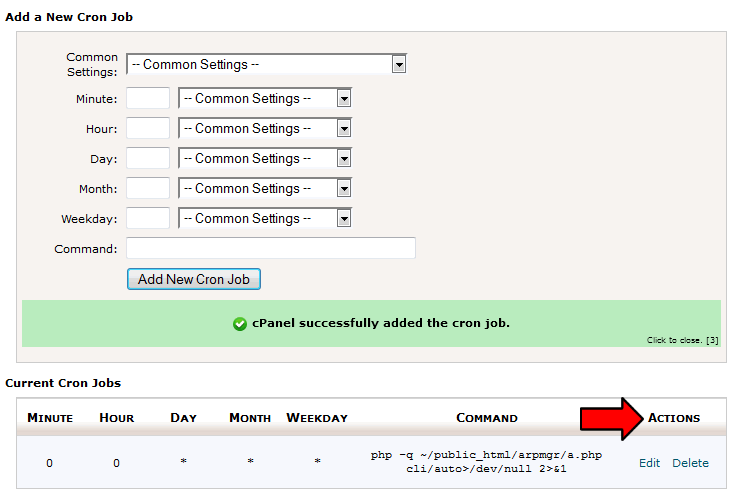
After adding the new cron job, cPanel will show you a message saying that it was created successfully, or it will show you an error message if something went wrong. If all went well, you should see your new cron job under “Current Cron Jobs.” You can edit or delete your cron job by clicking on the appropriate link under “ACTIONS.”

If you have any question or need consultation, please do not hesitate to contact us at: support@yi.com.pk

